by Łukasz Jakóbiec
Debricking a Formlabs Form 3+, Part 2: Booting the Real Kernel and Healing the Rot
Continuing the Form 3+ recovery: getting a root shell by booting the genuine kernel against my own rescue initramfs, finding the bit-rot was far wider than one file, and bringing the printer back by booting its clean A/B slot.
By this point I had a complete picture of the broken printer and one hard limit: the serial console takes no input, so the recovery has to be done without ever typing at the bootloader. This is how I got a root shell on the machine anyway, what I found when I looked properly, and the move that finally brought it back. It includes a full day spent down a dead end, because the reason that dead end failed is the most useful thing I learned.
The constraint I was working under
To recap the limit I had proved on the bench: I could read the boot log, and I could read and rewrite the boot flash with a Raspberry Pi, but the board's UART receive line is disabled in production. There is no interactive bootloader prompt available to me, at all. So every step from here has to be non-interactive: whatever I want the machine to do, I have to bake into the boot flash beforehand.
The obvious door: factory netboot recovery
These boards ship with a recovery mode. Hold a test button while powering on and, instead of booting normally, the firmware netboots: it asks for an address over DHCP, downloads a kernel and device tree over TFTP, and boots them with the root filesystem mounted over NFS from a hardcoded server address. That is a real door, and it needs no console.
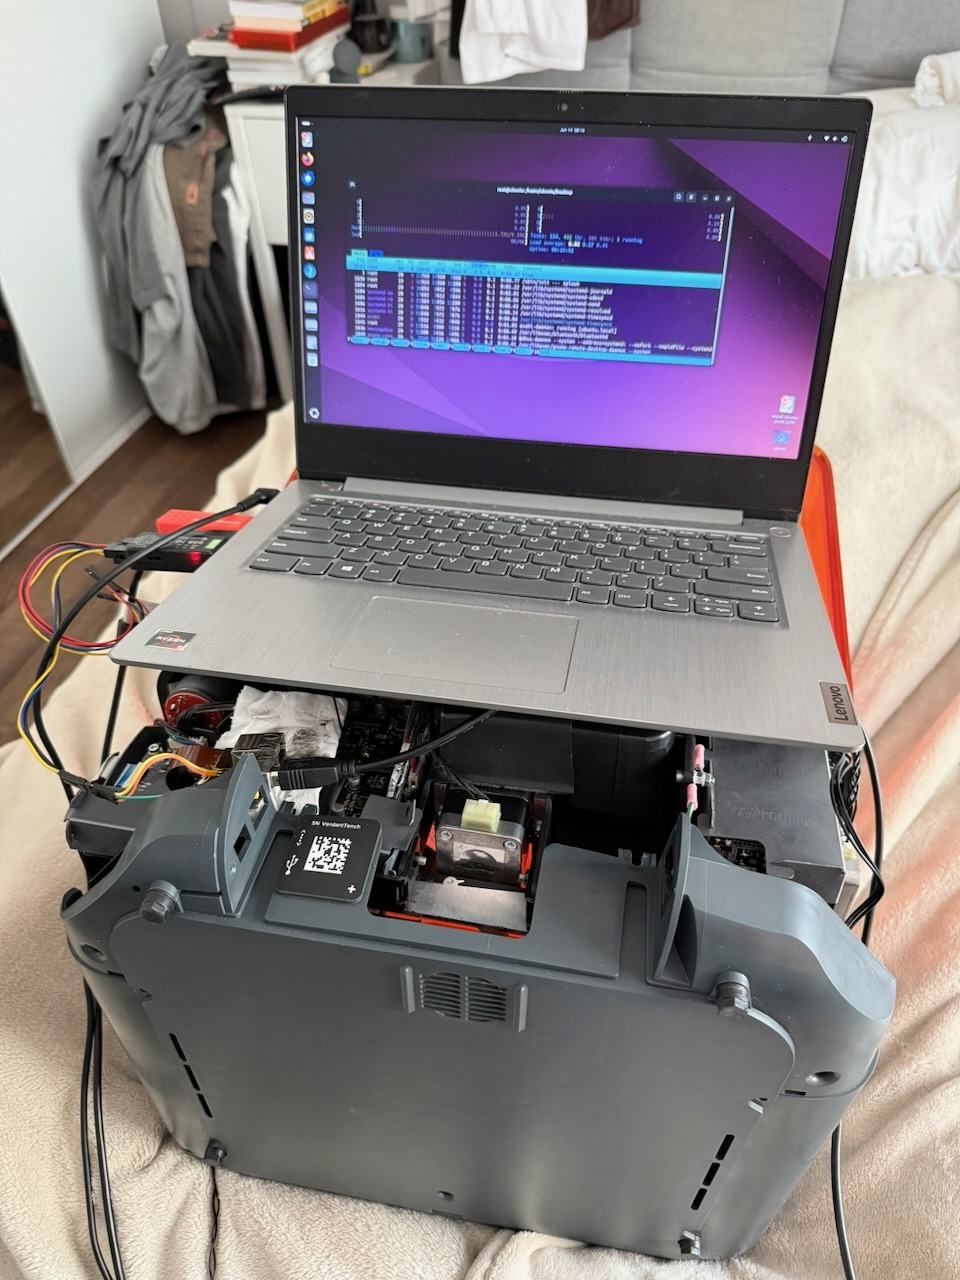
I built the server side: a small Linux box with a USB Ethernet adapter on the printer's network, running DHCP and TFTP. Power on with the button held, and the logs lit up:
DHCPDISCOVER from the printer
DHCPACK -> 10.0.0.50
sent /srv/tftp/zImage to 10.0.0.50
sent /srv/tftp/<devicetree> to 10.0.0.50
The printer's bootloader fetched my kernel and my device tree and ran them. The transport works perfectly. So I just need to hand it a kernel that does what I want.
This is where I lost a day.
The rabbit hole: a kernel that will not boot
I served a kernel. Nothing. The serial line produced a few bytes of garbage and then silence. No boot log, no panic, no network. I tried a stock TI SDK kernel. I built a mainline Linux 4.9.337 with a tiny BusyBox ramdisk baked in. I built TI's own vendor 4.9.147 kernel, the same lineage as the genuine firmware. Every single one died in the same place: a byte or two on the serial line, then nothing.
Meanwhile the genuine kernel, the one already on the eMMC, boots fine. I had its boot log.
So what was different? I dumped the bootloader environment and read the genuine boot command. The normal boot does, in effect:
load the kernel from eMMC to 0x82000000
load the device tree from eMMC to 0x88000000
bootz 0x82000000 - 0x88000000
My netboot used the exact same bootz command and the exact same load addresses. Same bootloader, same handoff, known good. The only thing different was the content of the kernel and device tree I handed it. The genuine pair boots, nothing I built does, and it dies so early it never prints a thing.
Two lessons came out of this, both the kind you only learn by hitting them.
The first: a vendor board's kernel is not a generic part. A Form 3+ runs a specific TI vendor kernel built for this exact silicon, with the right clock setup and errata handling. A mainline kernel for the same chip family is close but not identical, and "close" was enough to fault before it could even initialise its console. When I forced an early debug console, all I got back was a handful of garbage bytes like 08 f8 f0 f8 f8 f0, the classic look of a UART being driven at the wrong clock rate. The kernel was mis-driving the serial port because it had the wrong idea about the hardware.
The second, the cruel one: silent is checked for existence, not value. This bootloader runs silent in production. At some earlier point the silent variable had been set to 0, which you would reasonably assume turns silence off. It does not. U-Boot only checks whether the variable exists. silent=0 is just as silent as silent=1. So through every one of these netboot attempts the bootloader itself was mute, and I was trying to debug a kernel that would not print, behind a bootloader that would not print either.
The honest conclusion was to stop trying to boot my own kernel. The one kernel I know boots on this hardware is the genuine one sitting on the eMMC. Use that.
The pivot that worked: boot the real kernel against my own rescue
Here is the idea that turned it around. I do not need my own kernel. I need the genuine kernel to boot something I control instead of the broken root filesystem.
Linux supports exactly this. You can hand the kernel an initramfs, a small in-memory root filesystem, and it runs that instead of mounting a disk. If I could get the genuine kernel to boot with my initramfs, I would have a full root shell on the real hardware, with the real drivers, and the eMMC sitting right there as a block device.
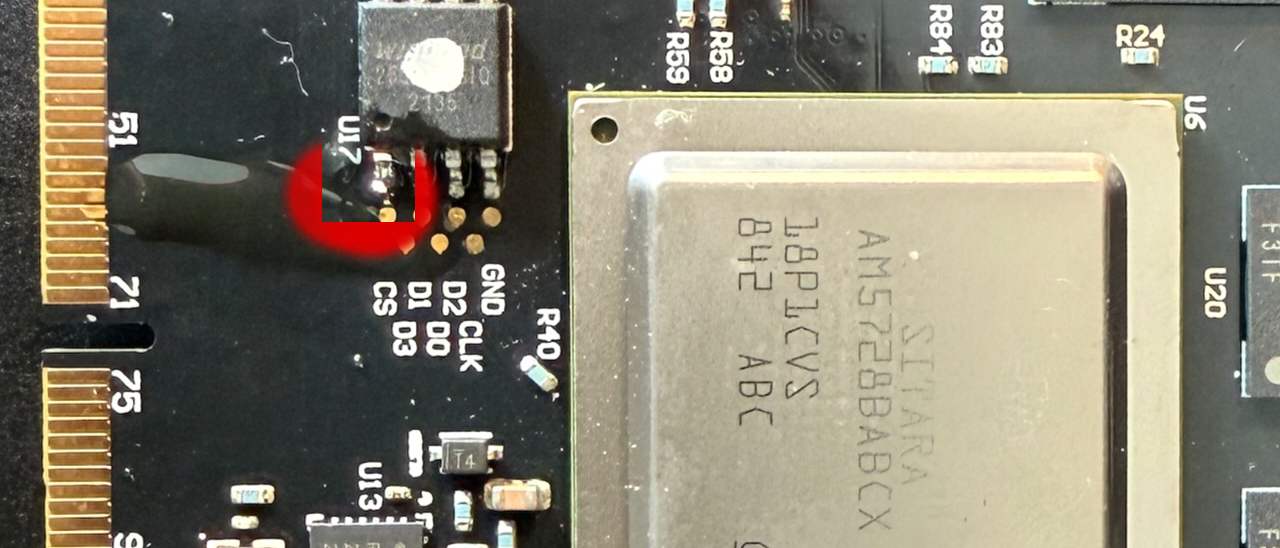
The bootloader environment lives in that 4 MB QSPI chip, and there is about 3 MB of unused space in it. That is plenty for a tiny BusyBox rescue system. So the plan became:
- Modify the QSPI environment so the boot command loads the genuine kernel and device tree from the eMMC (which I know works), then loads my rescue initramfs from the QSPI spare space, and boots the kernel with that initramfs. And delete
silentso I can finally see output. - Bake the rescue initramfs into the QSPI spare space.
- Write the chip back and boot.
Rebuilding the boot flash
The environment is a list of name=value pairs preceded by a CRC32. Get the CRC wrong and U-Boot rejects the whole block and falls back to defaults, so this had to be exact. I reproduced the genuine environment's checksum byte for byte first to prove I had the format right, then assembled a full 4 MB image: genuine first stage loader and U-Boot untouched, a new environment, and the rescue initramfs in the spare space. Before writing I confirmed the bootloader region was byte for byte identical to what was already on the chip, so the only changes were the environment and the spare space. flashrom writes only the changed blocks and verifies:
flashrom -p linux_spi:dev=/dev/spidev0.0,spispeed=1000 -c W25Q32JV -w rescue.bin
...
Erase/write done.
Verifying flash... VERIFIED.
Reconnect the chip-select, reconnect serial and network, power on.
The payoff: a root shell
For the first time, the bootloader printed. The genuine kernel came up, and instead of dying on the bad library it ran my /init:
FORM3 RESCUE INITRAMFS ALIVE  kernel=4.9.65+
eth0: 10.0.0.77
block devices: mmcblk0 mmcblk0p1 ... p5 p6 p7
A root shell, on the real printer, with the eMMC fully visible. From here it is ordinary Linux.
Back up everything first
First rule, before touching a single byte: image the whole chip. My rescue /init streams the entire device straight off the box to the storage server with nothing fancier than dd piped over netcat:
dd if=/dev/mmcblk0 bs=1M | nc <server> 9000About 15.6 GB, and the read came back completely clean, no errors, over roughly 47 minutes. That clean read matters as evidence: the media reads fine, which means the problem is bad data sitting in good cells, not a failing chip. That is the fingerprint of bit rot, captured before any repair, with a full image to fall back on if anything went wrong next.
Confirming the fault from the hardware
Mounting the root partition read-only and looking at the broken file confirmed the diagnosis exactly. The library is libc-2.26.so (glibc 2.26), and its first bytes were:
corrupt:  4f 45 e5 47 ...
correct:  7f 45 4c 46 ...   (the "\x7fELF" magic every ELF file starts with)
A handful of flipped bits in the header of a file on an otherwise intact filesystem. Not a power failure, not a bad update. Media level bit rot.
The fix was not one file
A nice surprise was waiting in the partition table: this firmware uses an A/B root filesystem, two copies on partitions 5 and 6, with the bootloader flipping between them. The printer had been running from partition 6, the bit-rotted one. Partition 5 holds the other copy, and its libc-2.26.so is a clean, byte-correct, identical-version build of exactly the file I needed. So the repair was not "find a compatible library online and hope," it was "copy the good one from the other partition over the bad one."
I copied the clean libc from partition 5 to partition 6 and ran a quick chroot sanity check. It segfaulted. That was the first sign the story was bigger than one file.
So before rebooting, I scanned the partition properly. The corruption was not one file, it was four, all in /lib and all physically adjacent:
libc-2.26.solibanl-2.26.solibnss_files-2.26.solibwrap.so.0.7.6
Four neighbouring files going bad together is exactly what a single contiguous bad region on the flash looks like. The libnss_files corruption is what made my chroot test segfault, because glibc loads it dynamically, so fixing libc alone would never have booted. All four had clean, identical-build copies on partition 5, so I rebuilt the rescue to fix all four from partition 5 to partition 6, verify each one's header read 7f454c46, and then restore the genuine bootloader environment so the printer would boot its own software again. The rescue reported the fix cleanly:
FIXED libc-2.26.so
FIXED libanl-2.26.so
FIXED libnss_files-2.26.so
FIXED libwrap.so.0.7.6
>>> ALL 4 LIBS FIXED <<<
>>> ENV RESTORED+VERIFIED <<<
I power-cycled into the normal firmware, expecting a working printer.
A partial boot, and the discovery that changed the plan
It booted further, but it did not come up. The panel backlight came on, the screen stayed blank, and the LPU (the laser and optics unit) never moved. That was real progress: init was clearly running now, the library panic was gone. But the application stack was stalling somewhere, and the machine never reached a usable state.
So I went back to that full backup I had taken, and this time I examined it properly rather than chasing single files. Two things came out of it.
First, a read-only filesystem check on partition 6 found damage in the filesystem metadata itself, not just file contents: a corrupted directory block under /lib/firmware and a broken extent tree on a wireless firmware file. The same check on partition 5 was perfectly clean.
Second, a proper scan of every binary on the partition, more than 1600 of them, checked against the clean copies on partition 5, showed the rot was far wider than four files. Partition 6 had more than two dozen corrupt files, all sitting in /lib and /lib/modules, one contiguous bad region:
- Core libraries beyond the original four, including
libcrypt, which large parts of userspace depend on, pluslibtinfo,libncursesw,libattr, and binaries likesshdandlsof. - Fifteen corrupt kernel modules, including
hid-multitouch, which is the touchscreen driver, the WiFi stack (mwifiexandwlcore), and several crypto and USB modules. - More corrupted directory blocks under
/lib/modules.
That explained the blank screen perfectly. With libcrypt damaged, userspace startup stalls, and with the touchscreen driver corrupt, the panel would not respond even if the interface had drawn. Reassuringly, the Formlabs application itself and all of its libraries were intact. The damage was confined to that one contiguous region of system libraries and kernel modules. And partition 5, the other copy, was completely clean.
Letting the printer heal itself
At this point I could have tried to hand-replace two dozen files and repair the corrupt directories, but that is fragile: salvaging damaged ext4 directories risks losing data, and the kernel modules from partition 5 belong to a different firmware build, so they might not even match the running kernel. There was a much cleaner option sitting right there.
Partition 5 was a complete, clean, working copy of the operating system, the printer's own A/B backup. All I had to do was tell the bootloader to boot it. That meant changing one variable in the environment, fl_bootpart, from 6 to 5. A single character, plus recomputing the CRC. Everything else in the boot flash, the first stage loader, U-Boot, and the reserved region, stayed byte for byte identical to the factory image. I flashed that with the Pi, verified it, and read it back to confirm it matched bit for bit.
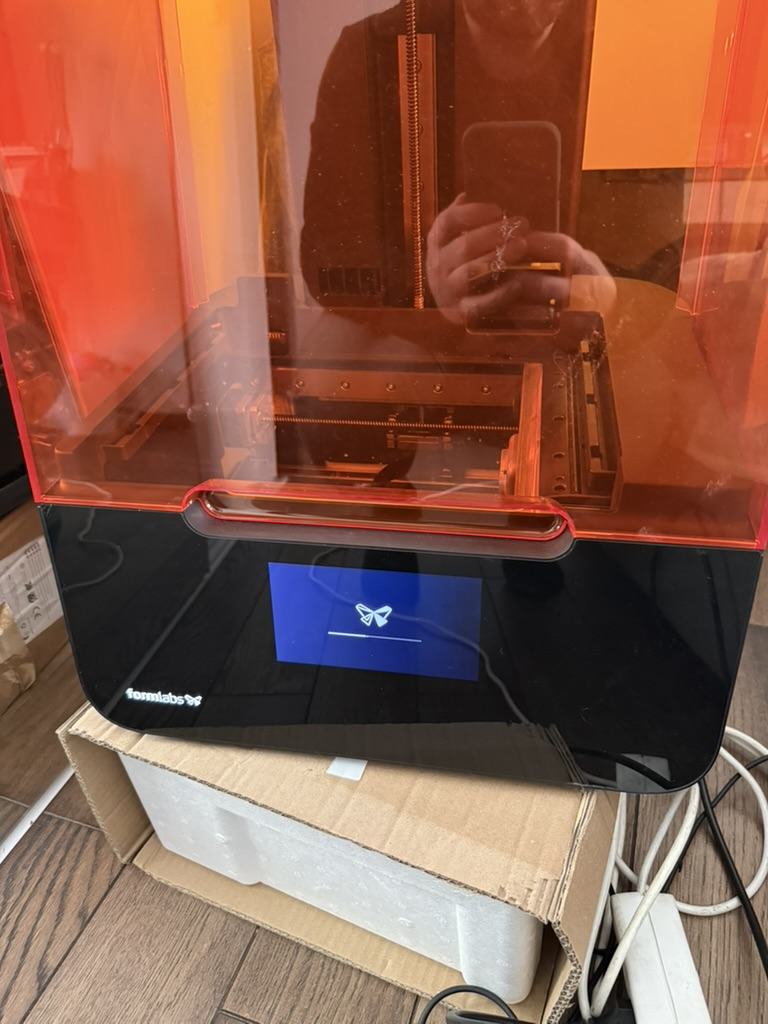
I disconnected the Pi, powered on, and the printer booted partition 5 to a full working interface. The touchscreen responded, because this copy's touchscreen driver was intact. It was running slightly older firmware, the previous A/B version, but it was a working printer again.
The last step healed the rot properly. From the working printer I ran a normal Formlabs firmware update. The A/B updater does exactly the right thing: it writes the new firmware to the inactive slot, which was the rotted partition 6, replacing every one of those corrupt files and metadata blocks with a complete, signed image. After the update the printer works, both slots are healthy, and it shows up over WiFi in PreForm. The one-byte change I made is absorbed back into the printer's normal A/B behaviour.

What I learned, and what I did not need
A few takeaways if you look after one of these machines:
- Bit rot is real on ageing eMMC. Years of logging and state writes wear the same chip, and a block can quietly return bad data on read long after it was written correctly. If a device that was never updated and never lost power suddenly will not boot, suspect the storage.
- An A/B layout is your best friend. If one slot rots, the other is a clean, version-matched source, and on this printer, the cleanest fix was not to repair the bad slot by hand at all. It was to boot the good slot and let the manufacturer's own update mechanism rewrite the bad one.
For completeness, since other writeups reach for them: I never needed the SoC's USB peripheral boot mode, or dra7xx-bootswitch, or DFU, or a USB mass storage gadget. Those are valid tools if you have no other way in. Here, the winning move was simpler than any of them: boot the kernel that already works, change only what it runs, and then let the printer's own A/B design and update path do the heavy lifting.